Showing posts with label snacks. Show all posts

Tuesday, June 11, 2013

chocolate popcorn

Today was Game 3 of the NBA Finals. I was sitting back, relaxing, and watching the Spurs come back from a disappointing Game 2. Halfway through the 2nd quarter, I realized I was missing something kind of important. Snacks. Not having anything to munch on at tip-off is seriously unacceptable in my book. But, during halftime, I was able to conjure up a quick batch of chocolate popcorn. Sweet sweet victory-- the outcome of the game and my amazing skills in pulling this off.

Popcorn is the perfect gametime snack, but the choco coating really makes this a treat. This chocolate popcorn is crunchy, not overly sweet, and so insanely addicting. Yes, I ate this whole bowl below in less than 3 minutes.. And then proceeded to go back for seconds. This was my dinner, by the way. But it's totally fine because I made sure to floss afterwards. Best Tuesday ever.


Chocolate Popcorn
Yields 8 Cups

INGREDIENTS
8 cups popped popcorn (1/3 cup unpopped kernels)

1/2 cup (1 stick) unsalted butter
1/2 cup white granulated sugar
1/4 cup Dutch-processed cocoa powder, sifted
1/4 cup light corn syrup
2 tsp vanilla extract

DIRECTIONS
1. Preheat oven to 250 degrees F and line a large, rimmed baking sheet with parchment paper.
2. Place popped popcorn into a large bowl.
3. In a saucepan on medium high, heat butter, sugar, cocoa powder, and light corn syrup. Stir with a wooden spoon and combine ingredients well.
4. Continue heating and stirring gently until mixture boils. Allow to boil for about 2 minutes, and then remove from heat.
5. Off the heat, stir in vanilla extract.
6. Pour mixture over popped popcorn. Carefully use wooden spoon to help coat all the popcorn with the chocolate mixture. 
7. Dump coated popcorn onto the parchment-lined baking sheet. Bake in preheated oven for 30 minutes, stirring at each 10-minute interval.
8. Allow to cool on the baking sheet for at least 5 minutes. While the popcorn is still somewhat warm, break apart into pieces or clusters.
9. Serve or store in an airtight container.

Thursday, June 6, 2013

crispy baked sweet potato chips

If you've ever attempted to make potato chips, you know that some recipes lie when they say "crispy", especially if they are oven-baked.

I've made potato chips every way possible. Frying requires so much oil. I'm usually so revolted as I'm watching the chips absorb the cups and cups of oil that my appetite immediately dissipates. Although frying them does seem to work well, I've been searching for the best way to bake my chips to crispytown.

White potatoes contain a lot of starch, requiring some kind of soaking technique. Eff that. Too much work. Sweet potatoes contain significantly less starch so, to me, the soaking thing isn't really necessary. This is why I like making sweet potato chips. And, they are also more nutritionally healthy, which is an added bonus (a.k.a. feel less guilty for eating a whole bowl).

There are just some things you shouldn't don't need a recipe to make. Sweet potato chips falls under this category (and these, too). But I'll tell you everything you need to know to make this crunchtastic snack.


First of all.. Yes, these are homemade. Secondly, they are also baked. And lastly (and most importantly), they are really crispy!

How to make Crispy Baked Sweet Potato Chips:

1. Slice sweet potatoes with a mandoline fitted with a thin slice blade. If you don't have a mandoline, get one. I firmly don't believe it's humanly possible to slice potatoes as evenly and thinly by hand. A mandoline will be your best friend-- as long as you remember to use the hand guard so you don't slice your fingers off. Seriously, this guy is helpful but can be harmful. It's better to waste the little bit of potato at the end of the guard than to have blood gushing everywhere.
2. Once your sweet potatoes are all sliced, put them into a large bowl. Drizzle with extra virgin olive oil. You want them coated but not drenched. There is a difference. It helps to start off modest and add more if necessary. Make sure the potatoes look coated but not too glossy. There shouldn't be excess oil at the bottom of the bowl. This is the time to season, as well. You can do the traditional salt and pepper. I like to do Kosher salt and cinnamon. So good. Again toss everything together well. You can also add more seasoning after they are baked, if necessary.
3. On a parchment-lined baking sheet, spread sweet potato slices out into an even single layer.
4. Bake in a preheated 200 degree F oven for 45 minutes. Flip sweet potatoes over. Then bake for an additional 45 minutes to 1 hour until sweet potatoes look super toasted.
5. Allow to cool on the baking sheet before serving. They will crisp as they cool.
6. Serve, eat, and enjoy this healthy chip alternative!

Friday, April 26, 2013

soft pretzel bites with dipping sauce trio

I woke up this morning to learn that my dear Russell Westbrook has to undergo knee surgery. This was is very upsetting. I thought to myself: how am I going to bounce back from this? Hours and hours later, I'm still not sure. But to keep my mind off the fact that my favorite NBA player will not be continuing for the remainder of the playoffs, I went straight to the kitchen.

In my attempt to turn my Friday into a happy one, I decided that it was only appropriate to celebrate National Pretzel Day today. I was passing through one of my favorite blogs, and came across a soft pretzel bite recipe I just had to try. So, I did.. And also made a trio of dips to go with them. If you don't already have Two Peas & Their Pod on your Google Reader, Feedly, whatever.. get it on there immediately!


Soft Pretzel Bites
Recipe by Two Peas & Their Pod
Yields: Too many to count, about 5-6 dozen

INGREDIENTS:
1 1/2 cups warm water
2 Tbsp light brown sugar
2 1/4 tsp (1 package) active dry yeast
6 Tbsp (3oz) unsalted butter, melted
2 1/2 tsp kosher salt
4 1/2 to 5 cups all-purpose flour (4 1/2 cups was perfect for me)
vegetable oil (I used canola)
3 quarts water
3/4 cup baking soda
1 whole egg, beaten with 1 Tbsp cold water
coarse sea salt

DIRECTIONS
1. Combine warm water, light brown sugar, yeast, and butter into bowl of a stand mixer. Mix with dough hook, then allow to sit for about 5 minutes until yeast has bloomed.
2. In a separate bowl, whisk together flour and salt. Pour dry mixture to wet mixture and incorporate on low speed. Increase speed to medium for 3-4 minutes until dough is smooth and pulls away from the side of the bowl. If the dough appears wet, add 1 Tbsp of flour at a time. Remove dough from bowl and place on unfloured surface. Knead the dough into a ball with your hands.
3. Lightly grease a bowl with vegetable/canola oil. Place dough ball into greased bowl and turn to coat with oil. Cover bowl with plastic wrap and allow to proof for about 1 hour in a warm spot. Dough should double in size before using.
4. Preheat oven to 425 degrees F.
5. Remove dough from bowl and place onto a flat surface. Divide the dough ball into 8 relatively equal pieces. The best way to do this is to cut it like a pie-- in half, then in quarters, then in eighths. Roll each piece into a long rope and cut into about 1-in pieces. It isn't important to be exact.
6. Boil the 3 quarts of water in a large pot. Once boiling, add baking soda. Please make sure you are using a large enough pot because water will vigorously boil and foam up once baking soda is added.
7. Add cut dough pieces to boiling water solution. Boil for about 30 seconds, and then remove with a large slotted spoon. Place all boiled pretzel bites onto a parchment lined baking sheet. You will have a lot of pretzel bites, so I needed to bake them all in 2 batches. 
8. On another parchment-lined baking sheet, place as many pretzel bites as you can without them touching. Brush the tops with the egg wash and sprinkle with sea salt. Bake in the oven for 15-18 minutes until golden brown. Repeat this process with the remaining pretzel bites that could not fit on the 1st tray.
9. Allow baked pretzel bites to cool on a baking rack (or directly on the baking sheet is fine).
10. Serve with your favorite dips.


With all these pretzel bites, it's great to have dip choices..


Here's a trio that will hopefully satisfy your sweet, savory, or spicy cravings. Enjoy!


Ginger Honey Mustard Dip

INGREDIENTS
1/4 cup whole grain dijon mustard
1/4 cup honey
1/2 tsp ground ginger

DIRECTIONS
1. Mix all ingredients together and serve! Duh.


Sriracha Ketchup Dip

INGREDIENTS
2 Tbsp ketchup
1/2 tsp siracha

DIRECTIONS
1. Combine ingredients. If you prefer more spice, add more sriracha. But this was a good balance for me.


Nutella and Peanut Butter Dip

INGREDIENTS
Nutella 
Peanut Butter

DIRECTIONS
1. This is the easiest dip of all. Just scoop out some Nutella. Then, drizzle some peanut butter directly on top. I use natural peanut butter (where peanuts are the only ingredient), which tends to be a little more liquid-like, so it works well for this.

Tuesday, February 5, 2013

loaded sweet potato bites

It's a good thing I have no interest in football, or else I might be upset that my Bay Area team came up short. The Niners did not have a great Super Bowl Sunday, but I sure did. Big surprise, my favorite part about Super Bowl Sunday is making cute bite-sized foods.

Since making these, I've had this carton of sour cream chillin in my fridge. Even though it's not Paleo, I just hate wasting ingredients. After work on Saturday, I made a stop at Trader Joe's. I knew I wanted to make little loaded sweet potato bites. It was a little disappointing to come home realizing I did not have the green onion I thought I had. Worst feeling in the world as I scoured every drawer and shelf of the refrigerator. Oh well, I made it work. Try these out. They are delish!

Loaded Sweet Potato Bites

INGREDIENTS
2 medium sweet potatoes
2 Tbsp olive oil
3/4 tsp kosher salt
1 tsp paprika
1/2 tsp granulated garlic
1/2 tsp dried rosemary
1/2 tsp dried thyme
1 tsp chili powder

toppings (optional): 
3 slices crispy bacon, chopped
parsley, chopped (can also use green onion or chives)
sour cream
shredded cheese
whatever you put on your loaded baked potato!

DIRECTIONS
1. Preheat oven to 450 degrees F. Line a baking sheet with parchment paper.
2. Thoroughly wash sweet potatoes and dry with a paper towel. Cut off and throw away the ends. Then, slice sweet potatoes into about 1/4" thick pieces.
3. Place sweet potatoes in a medium bowl along with all the other ingredients (except toppings). Mix everything together well with a spoon or your hands-- whatever works for you. Make sure all sweet potato slices are coated well with olive oil and seasoning.
4. In an even layer, spread sweet potatoes out onto the lined baking sheet.
5. Bake in the preheated oven for 10 minutes. Then, flip all potato slices over. Place back into the oven for about 12 more minutes or until they develop a nice golden "crust" color.
6. Let the sweet potatoes cool slightly first before adding toppings (don't want your sour cream to melt!). Top with whatever you like! If you want to add cheese, I would sprinkle a little bit of shredded cheddar or parmesan on top and pop back into the oven to melt before adding other toppings.

To make this recipe Paleo, you would just omit sour cream as a topping option. Honestly, they would still taste good. I just happened to have sour cream I needed to use, and it also helps all the other toppings to stay on top of the sweet potato. My compromise for using the sour cream was not adding any cheese. Although, I do not recommend skipping out on the crispy bacon. Crispy bacon with the seasoned sweet potato is heavenly. But that's just my personal fatty opinion. I believe everything tastes better with bacon.

Friday, January 18, 2013

a week of granola

I am addicted to granola. I will put it on anything and everything, but it's even better on it's own as a snack. The problem is that most granola on the market contains oats/grains, and well that's not Paleo-friendly. Even if you can track down a good granola or trail mix, they always seem overpriced for such a small portion. And all that money for snacking adds up, which just makes me want to buy a $.99 bag of chips.

Well, guess what? Granola is actually so simple to make. I used to make it with oats, but now I just pack it with variety of nuts, seeds, and dried fruit to make it super hearty and delicious. Grain-free, Paleo-friendly, and unprocessed-- there's really no need to buy granola again.

Grain-Free Granola
yields about 7 cups

INGREDIENTS
1 1/2 cups sliced or slivered almonds
1 cup roasted, unsalted sunflower seeds
1 cup roasted, salted pepitas
1 cup roughly chopped/crushed unsalted cashews
3/4 cup chopped unsalted walnuts
1/2 cup dried blueberries
1/2 cup dried cranberries
1 cup shredded coconut
1 1/2 tsp ground cinnamon
1/4 cup honey (I used a dry measuring cup)
2 tsp coconut oil, melted

DIRECTIONS
1. Preheat oven to 350 degrees F.
2. Put all ingredients into a large bowl. Combine everything together well with a wooden spoon.
3. Dump the mixture onto a parchment lined baking sheet and spread out into an even layer.
4. Bake in your preheated oven for about 20 minutes, gently mixing the mixture in between.
5. Remove from the oven and allow to cool on the baking sheet.
6. Granola can be stored once cooled.

**NOTES: I couldn't find any pepitas that were roasted AND unsalted. Since I don't add any extra salt to the recipe, it's okay to have one of the nuts/seeds be salted. However, be careful because I find that the "salted" versions tend to be overly salty. I advise buying everything unsalted and add a dash of salt to the mixture if you'd like, so that you can better control the amount of salt.
Seriously, SO easy. One bowl, one spoon, one sheet. That's it. This is a great snack for a group, but I usually try to keep it all for myself. Since it makes about 7 cups, I measure 1 cup of granola into 7 sandwich baggies. Then, I have a snack already prepared for each day of the week! Now, someone please pass me a bowl and unsweetened coconut milk. I'm about to have a cereal break right now.
Enjoy my Grain-Free Granola! Hope you love it!

Friday, January 11, 2013

baked crispy kale chips

I don't know why it's taken me so long to make kale chips. Really, though. I came home from my New York vacation vowing to get back to Paleo.

The first thing I did was open my fridge to find a bunch of kale I had bought right before I left. It looked good still, so I decided that I should just use it right away. I knew I wanted to make kale chips, but I have very little experience working with kale. So, obviously I turned to Google to give me some answers.

I stumbled upon a Food Network recipe by Melissa d'Arabian. It looked promising.. 5 star rating, lots of reviews, and look at that.. it has "Crispy" right there in the title. Bingo.

Crispy Kale Chips
Recipe courtesy of Melissa d'Arabian via The Food Network

INGREDIENTS
1 head kale, washed and thoroughly dried
2 tablespoons olive oil
sea salt, for sprinkling

DIRECTIONS
1. Preheat the oven to 275 degrees F
2. Remove the ribs from the kale and cut into 1 1/2-inch pieces. (Just break up with your hands)
3. Lay onto a baking sheet and toss with olive oil and salt.
4. Bake until crisp, turning the leaves halfway through, about 20 minutes.

After glancing the recipe, I came across a few things: 1) Apparently you only need 3 ingredients-- kale, olive oil, and salt; 2) this is byfar the shortest recipe I've seen on the Food Network site; 3) the estimated 25 minutes for prep time is outrageous.
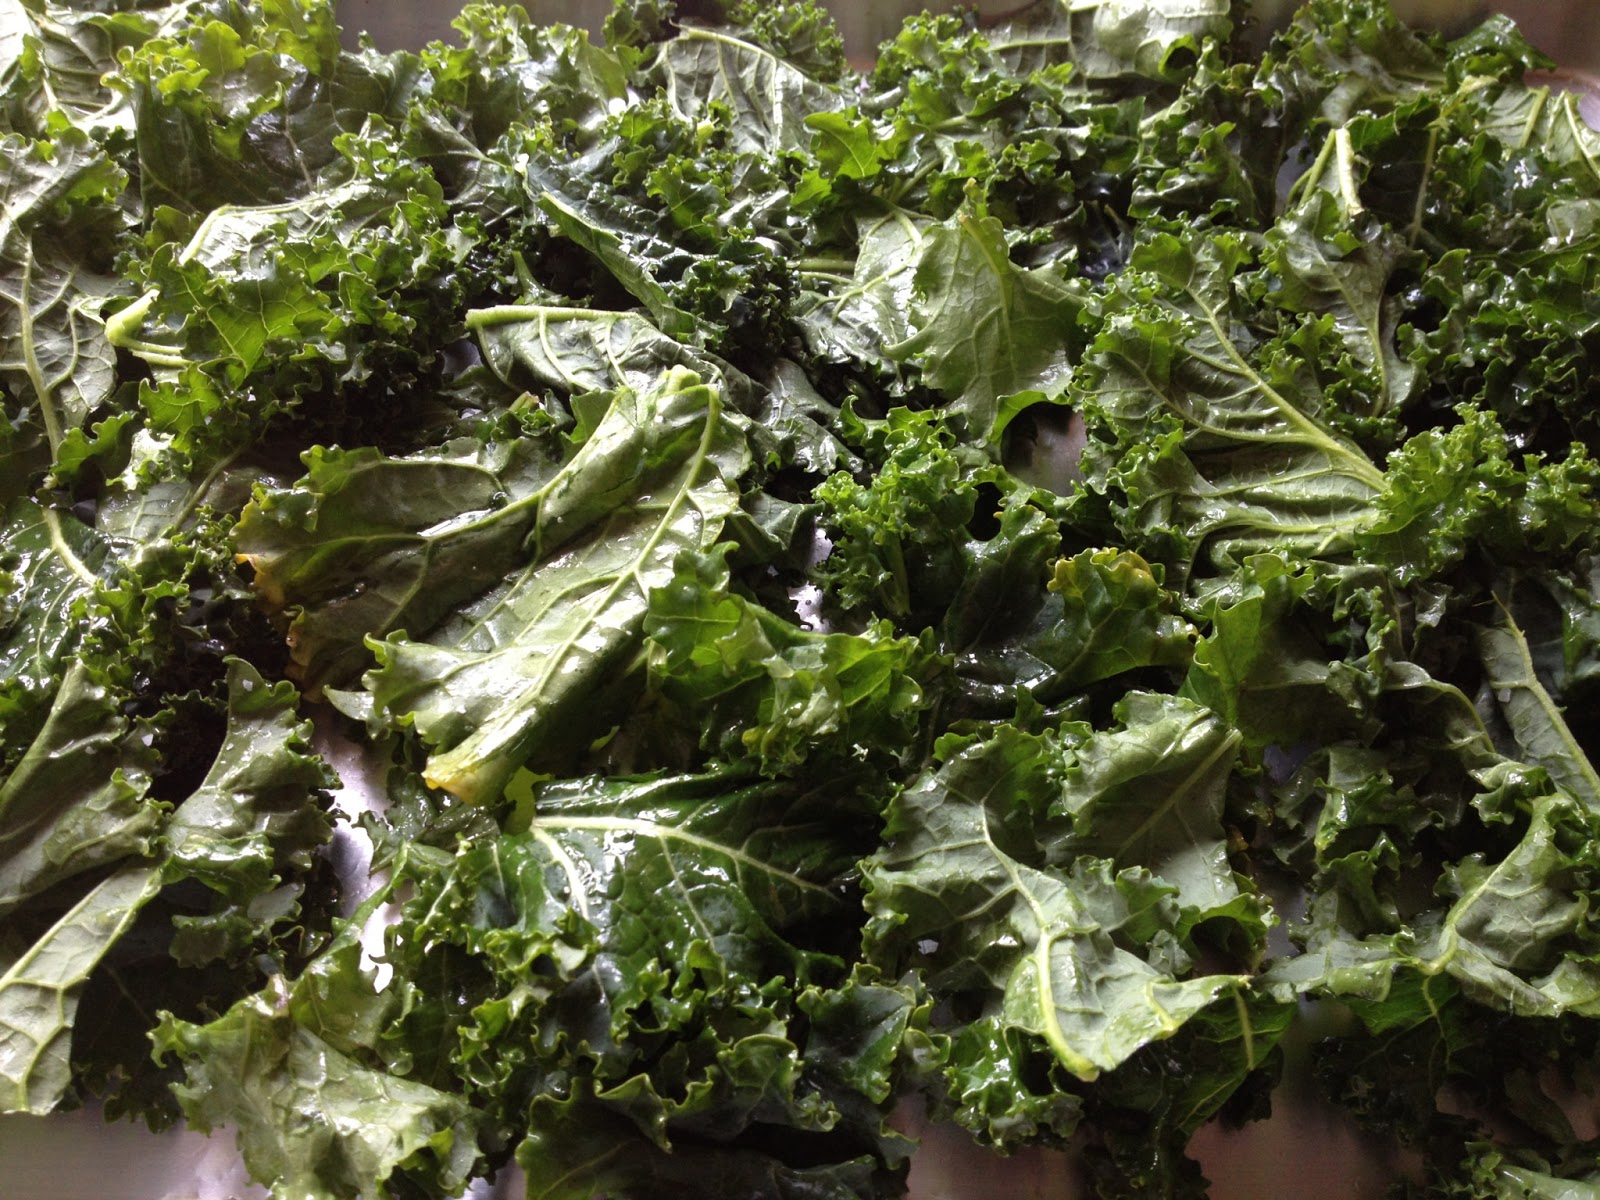
I'm a nonconformist, so I mostly only use actual measurements when I really can't afford to screw up a meal or when I'm baking (because I get really upset when I waste flour, butter, and sugar). I'm not even sure how much kale I actually had. I just washed, dried, very lightly dressed with olive oil, and sprinkled with a pinch of salt. General rule of thumb-- it's always better to under dress and under season, then add more if necessary. More is never more, people. Once you over do it, there's no going back. So, this is how my kale looked after adding the olive oil and salt:
I set all my kale onto my baking sheet, drizzled a little olive oil, tossed with my hands. The right amount of olive oil is probably what you consider to be not enough. There is no excess olive oil dripping off the leaves and onto the pan. The sprinkling of salt came at the end. I read from the reviews that it can taste very salty. So again, go with less.

As instructed, I popped my baking sheet of kale into a preheated 275 degree F oven and used 20 minutes as a marker (still flipping in between). After the 20 minutes, most of the kale was crispy but I added a few more minutes to give some of the less crispy ones more time. This is what it looked like out of the oven:
You can see the kale shrinks quite a bit. I advise buying a few bunches of kale if you intend on sharing. I'm not sure if the picture does these crispy kale chips any justice. They really do come out crispy and better than I could have imagined. If you are looking for an easy, tasty way to use kale, this is it!!
I had these kale chips with a fried egg, a couple pieces of bacon, and apple slices. Delish.